I choose a lazy person to do a hard job. Because a lazy person will find an easy way to do it. - Bill Gates
While we’re not endorsing laziness, we do think there’s some truth to making your life easier when you can – especially around the holiday rush! So today we’re going to show you how you can set your elves up for success by removing the repetitive tasks and create time saving presets.
Before we jump in there’s one thing to point out, presets are not global. They are only visible to the terminal that created them.
Alright let’s jump in!
Creating Wave Presets
First let’s navigate to the warehouse menu section and then click on Shipment Wave. This will open up the Shipment Wave tool.
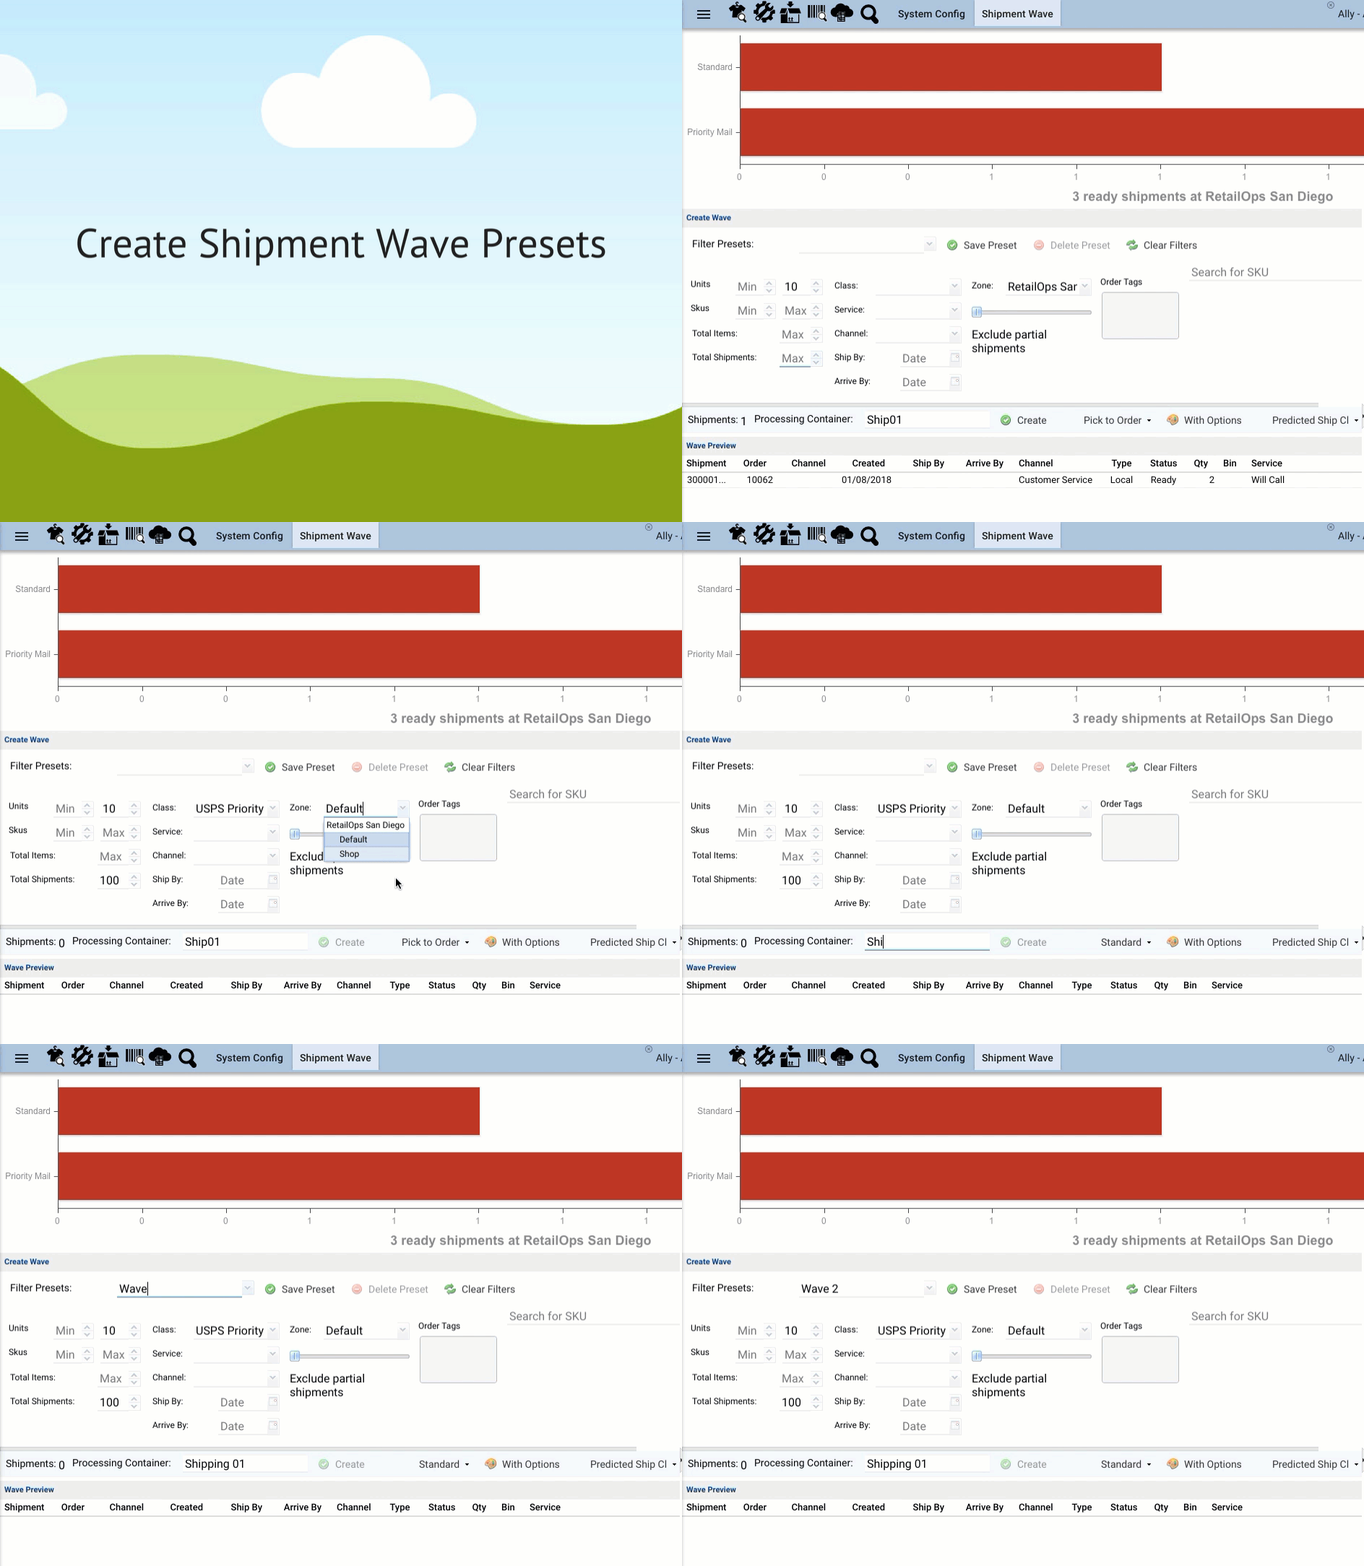
For this tutorial you can disregard the metrics and graph that you see when you first open up this tool. We are after the information just after it, the “create wave” section. In this section we will add in all our wave parameters and filter everything we don’t want out – if you want to learn more about what each parameter does, click here. Next you will need to set your Wave Type from the drop down menu at the bottom of this section (shown in image below).
Here’s a quick rundown of what each of those choices mean:
- Standard. RetailOps will print both pick labels and packing slips.
- Pick to Order. RetailOps will print packing slips with lot barcodes, eliminating the need for pick labels.
- Bulk Ship. RetailOps will print the packing slip and shipment label for all shipments at the time of wave generation. This is used only for shipment waves of the same SKU or group of SKUs.
- Consolidated Ship. RetailOps will print a “Pick to order” packing slip and shipping label on one sheet, using the combined lot weights for the shipment weight. This is intended for use with 4x6 integrated label stock (Example - Uline S-21946) and specific carriers. Please contact help@retailops.com if you are interested in using this wave type.
- Singles. Single item shipments only. Singles waves offer a special shipment audit process to process large batches of single items orders in a more streamlined workflow. Learn more about singles waves here: Singles Waves

(For reference)
And if you are following along and messing around with some options you may have noticed that orders may have appeared or disappeared under the “Wave Preview” section. This little handy section allows you to see what types of orders/shipments will be processed at its current state. It’s always good practice to be referring to this section to make sure you’re seeing (or not seeing) the orders that you want.
Once you are happy with everything, enter a descriptive name in the “Filter Presets” box and click Save Preset.
And if you ever need to remove a preset from your terminal, select a preset from the list, and select Delete Preset
Now enjoy a short gif loop that shows the whole process from beginning to end.

Are you opperating at 100% efficiency?
Have one of our retail experts create a custom succcess plan with detailed insight into your operations, process, and what efficient selling on Shopify looks like. This plan is not tied to RetailOps, this is just our way of giving back to the retailing community.
Want more helpful tricks and tips?
Here’s more helpful videos that cover receiving, putaway, shipment waves, single shipment waves, picking, and shipping! And after watching all these videos you should be a RetailOps Pro, but if you still have questions, don’t hesitate to reach out to us!
How to receive inventory quickly
How to put inventory away with our iOS app
How to create shipment waves
How to create single shipment waves
How to pick shipment waves
How to create shipping labels
Well, that’s all for today! To continue your RetailOps education head over to our knowledge base and as always, if you have any questions reach out to us! We’re here to help.
Happy Retailing!